Author: tz61

  • WSL上 编译ffmpeg, openssl for android记录 2022/02

    WSL上 编译ffmpeg 4.4 for android

    时效性声明

    本文写于2022/02

    用ndk r21e clang编译无问题,但是运行时出现:

    2022-02-14 10:53:47.398 26933-26933/com.tzztn.ffmpegdemo E/AndroidRuntime: FATAL EXCEPTION: main
        Process: com.tzztn.ffmpegdemo, PID: 26933
        java.lang.UnsatisfiedLinkError: dlopen failed: cannot locate symbol "__floatunsitf" referenced by "/data/app/~~rxIVrYdwQfvzfrPQgk-rNQ==/com.tzztn.ffmpegdemo-_KMsVHfwYjw-gEGSKKA-sQ==/lib/arm64/libavutil.so"...

    用ndk r17c gnu 编译无问题,但是运行时出现:

    2022-02-14 10:55:27.856 27319-27319/com.tzztn.ffmpegdemo E/AndroidRuntime: FATAL EXCEPTION: main
        Process: com.tzztn.ffmpegdemo, PID: 27319
        java.lang.UnsatisfiedLinkError: dlopen failed: cannot locate symbol "__paritydi2" referenced by "/data/app/~~8WNERmKNToktGfjoMK8_6g==/com.tzztn.ffmpegdemo-2D-4kyUQ2yVtAsYKMD3_lg==/lib/arm64/libavcodec.so"...

    貌似缺少一些符号,但是找不到相关信息
    猜想是libstdc++.solibc++_shared.so编译关系

    在windows上编译,但由于ffmpeg编译脚本没有考虑Windows上的交叉编译工具链ld的参数所以不能用

    后记:
    不是用了clang 就是默认用libc++.so

    使用ffmpeg3.3.9 NDK r13b(NDK路径下面没有sysroot,在platform的架构文件夹里)
    这是src的一个buildscript,看它里面并没有ADDI_LDFLAGS,所以链接的时候库应该是从–extra-ldflags和–sysroot下的/usr/lib里找的,但没有ADDI_LDFLAGS和SYSROOT,./configure时会因为没有库而让编译器报错而提示

    2024后记:这原文不是有sysroot么…

    home/ztn/android-ndk-r13b/toolchains/aarch64-linux-android-4.9/prebuilt/linux-x86_64/bin/aarch64-linux-android-gcc is u
    nable to create an executable file.
    C compiler test failed.

    因为在configure使用了一个简单的程序来测试能否通过编译(没有任何输出)

    if test "$?" != 0; then
        echo "$cc is unable to create an executable file."
        if test -z "$cross_prefix" && ! enabled cross_compile ; then
            echo "If $cc is a cross-compiler, use the --enable-cross-compile option."
            echo "Only do this if you know what cross compiling means."
        fi
        die "C compiler test failed."
    fi

    疑问2:$NDK/sysroot 与$NDK/platform/android-xxx/arch-$ARCH 的sysroot有什么区别

    突破:在ndk-r13b编译3.3.9源码通过且能运行,尝试用ndk-r21e 编译ffmpeg3.3.9源码

    • 0:(ndk-r13b 编译ffmpeg4.4,源码太新了无法编译):

    libavformat/udp.c: In function ‘udp_set_multicast_sources’:
    libavformat/udp.c:296:28: error: request for member ‘s_addr’ in something not a structure or union
    mreqs.imr_multiaddr.s_addr = ((struct sockaddr_in *)addr)->sin_addr.s_addr;

    ①(ndk-r21e 编译ffmpeg3.3.9,源码太旧了无法编译)(build_clang.sh):

    libavdevice/v4l2.c:135:9: error: assigning to ‘int (*)(int, unsigned long, …)’ from incompatible type ‘
    SET_WRAPPERS();

    • ②(ndk-r17c 编译ffmpeg3.3.9,源码太旧了无法编译)(build_gcc.sh)
      libavutil/time_internal.h:26:26: error: static declaration of 'gmtime_r' follows non-static declaration
      static inline struct tm *gmtime_r(const time_t* clock, struct tm *result)
                            ^
      In file included from libavutil/time_internal.h:22:0,
                   from libavutil/dict.c:27:
      /home/ztn/android-ndk-r17c/sysroot/usr/include/time.h:75:12: note: previous declaration of 'gmtime_r' was here
      struct tm* gmtime_r(const time_t* __t, struct tm* __tm);
    • ③用ndk-r17c gcc 编译ffmpeg4.4 (build64_gcc):
      成功编译,但还是用不了
    • ④用ndk-r17c gcc 编译ffmpeg4.4 (build64_gcc)(关闭nostdlib):
      ./configure报错
      Q1:考虑是不是sysroot的原因
      A1:不是
      Q2:会不会是nostdlib的原因
      A2:不是,且nostdlib一定要加上

      NEEDED               libswresample.so
      NEEDED               libavutil.so
      NEEDED               libm.so
      NEEDED               libz.so
      NEEDED               libavfilter.so
      NEEDED               libavformat.so
      NEEDED               libavcodec.so
      NEEDED               libavutil.so
      NEEDED               libswscale.so
      NEEDED               libavformat.so
      NEEDED               libavcodec.so
      NEEDED               libswresample.so
      NEEDED               libavutil.so
      NEEDED               libm.so
      NEEDED               libavcodec.so
      NEEDED               libavutil.so
      NEEDED               libm.so
      NEEDED               libz.so
      NEEDED               libm.so
      NEEDED               libavutil.so
      NEEDED               libm.so
      NEEDED               libavutil.so

      所以额外需要m,z
      尝试将m,z导入 目录(android-ndk-r17c/platforms/android-21/arch-arm64/usr/lib)libm.so libz.so
      但缺少的不是m,z库,而是别人dlopen的库啊。。。
      暂时告一段落,不知所措

    move on,在源码中用正则表达式搜lib.*.so
    默认关闭硬件加速器,所以也不可能是这几个
    写了个脚本(dumpz.sh)

    #!/bin/bash
    mkdir funcs
    for f in *.{a,so};
    do
        objdump -x $f|grep F >funcs/$f.txt;
    done
    for f in funcs/*.txt;
    do
        grep -r $1  $f;
    done

    找$NDK/sysroot/usr/lib/$ARCH-linux-android/ 和 $NDK/platforms/android-21/usr/lib 下的库中的符号
    没有出现__floatunsitf__paritydi2,更离谱的是ffmpeg4.4源码里也没有这两个函数
    不搞了

    最后在网上一搜
    https://github.com/gcc-mirror/gcc/blob/master/libgcc/soft-fp/floatunsitf.c
    发现这玩意是在gcc库里面的,我去,gcc编译器拉一堆屎在别人的项目里?
    路径是android-ndk-r17c/toolchains/aarch64-linux-android-4.9/prebuilt/linux-x86_64/lib/gcc/aarch64-linux-android/4.9.x/libgcc.a
    再一找发现__paritydi2也tm在里面

    于是我把这一个826K的静态库链接进去,,,
    不行,因为人家是a库
    不搞了没时间了
    试试5.0版本
    竟然只要指定sysroot?的确是这样的。。
    而且编译通过了,还可以运行!
    回退到4.4版本
    注释库和头文件变量
    我曹,竟然也可以了
    以后看一下configure是怎么对sysroot这个参数进行处理的,太神奇了

    其实这次很好地学习了交叉编译的过程,以及深入理解什么是编译
    有空可以好好阅读一下openssl3.0.1的Configure文件是如何通过

    export ANDROID_NDK_ROOT=/home/ztn/android-ndk-r21e
    PATH=$ANDROID_NDK_ROOT/toolchains/llvm/prebuilt/linux-x86_64/bin:$ANDROID_NDK_ROOT/toolchains/arm-linux-androideabi-4.9/prebuilt/linux-x86_64/bin:$PATH
    ./Configure android-arm64 -D__ANDROID_API__=21

    这么简单地就完成对库的查找,头文件的查找,其实编译很简单,只要找到工具链,头文件和库
    但复杂起来,头文件也要有sysroot(include <>和""的区别),以及不同架构下的不同库,少一样就可能出现上述bug
    这次失败还有一个原因就是对NDK结构不熟悉,他们写configure脚本的肯定知道每个版本的ndk结构是怎么样的,才能写出脚本
    所以抽空可以看一下这些configure
    cmake,xmake看着高级,其实也在做这些事情,只不过更方便罢了

    2024/02.23 后记

    现在最新的Andriod NDK里面都没有platform文件夹了,真正的sysroottoolchain/prebuilt/llvmsysroot里面

    最后附一个能用的脚本

    #!/usr/bin/env bash
    
    export HOST_TAG=linux-x86_64
    export ARCH=aarch64
    export CPU=arm64-v8a
    export MIN=21
    
    export PREFIX=$(pwd)/android_output/$CPU
    export NDK=/home/ztn/android-ndk-r21e
    
    export MIN_PLATFORM=$NDK/platforms/android-$MIN
    export TOOLCHAIN=$NDK/toolchains/llvm/prebuilt/$HOST_TAG
    export SYSROOT=$TOOLCHAIN/sysroot
    export AR=$TOOLCHAIN/bin/$ARCH-linux-android-ar
    export AS=$TOOLCHAIN/bin/$ARCH-linux-android-as
    export CC=$TOOLCHAIN/bin/$ARCH-linux-android$MIN-clang
    export CXX=$TOOLCHAIN/bin/$ARCH-linux-android$MIN-clang++
    export LD=$TOOLCHAIN/bin/$ARCH-linux-android-ld
    export NM=$TOOLCHAIN/bin/$ARCH-linux-android-nm
    export RANLIB=$TOOLCHAIN/bin/$ARCH-linux-android-ranlib
    export STRIP=$TOOLCHAIN/bin/$ARCH-linux-android-strip
    #用绝对路径
    ADDI_CFLAGS="-I/home/ztn/openssl3.0.1/include"
    ADDI_LDFLAGS="-L/home/ztn/openssl3.0.1"
    #ADDI_LDFLAGS="-Wl,-rpath-link=$MIN_PLATFORM/arch-arm64/usr/lib -L$MIN_PLATFORM/arch-arm64/usr/lib -nostdlib"
    
    sed  -i  "s/SLIBNAME_WITH_MAJOR='\$(SLIBNAME).\$(LIBMAJOR)'/SLIBNAME_WITH_MAJOR='\$(SLIBPREF)\$(FULLNAME)-\$(LIBMAJOR)\$(SLIBSUF)'/" configure
    sed  -i  "s/LIB_INSTALL_EXTRA_CMD='\$\$(RANLIB) \"\$(LIBDIR)\\/\$(LIBNAME)\"'/LIB_INSTALL_EXTRA_CMD='\$\$(RANLIB) \"\$(LIBDIR)\\/\$(LIBNAME)\"'/" configure
    sed  -i  "s/SLIB_INSTALL_NAME='\$(SLIBNAME_WITH_VERSION)'/SLIB_INSTALL_NAME='\$(SLIBNAME_WITH_MAJOR)'/" configure
    sed  -i  "s/SLIB_INSTALL_LINKS='\$(SLIBNAME_WITH_MAJOR) \$(SLIBNAME)'/SLIB_INSTALL_LINKS='\$(SLIBNAME)'/" configure
    
    ./configure \
    --prefix=$PREFIX \
    --ar=$AR \
    --as=$AS \
    --cc=$CC \
    --cxx=$CXX \
    --nm=$NM \
    --ranlib=$RANLIB \
    --strip=$STRIP \
    --sysroot=$SYSROOT \
    --arch=$ARCH \
    --target-os=android \
    --enable-cross-compile \
    --disable-asm \
    --enable-shared \
    --disable-static \
    --disable-ffprobe \
    --disable-ffplay \
    --disable-ffmpeg \
    --disable-debug \
    --disable-symver \
    --disable-stripping \
    --enable-openssl \
    --enable-protocols \
    --enable-protocol=https \
    --enable-mediacodec \
    --enable-decoder=h264_mediacodec \
    --enable-decoder=hevc_mediacodec \
    --enable-decoder=mpeg4_mediacodec \
    --enable-encoder=h264_mediacodec \
    --enable-encoder=hevc_mediacodec \
    --enable-encoder=mpeg4_mediacodec \
    --enable-hwaccel=h264_mediacodec \
    --enable-jni \
    --extra-cflags="-Os -fpic $OADDI_CFLAGS" \
    --extra-ldflags="$ADDI_LDFLAGS"
  • 【每周学习摘要17(23/02/19-24/02/25)】

    Windows原生编译openssl 脚本

    :: must be executed at the same directory as root of this project
    :: need to install StrawBerry Perl and NASM, then fill in those two environment variables.
    set StrawBerry=D:\Strawberry
    set NASM_dir=D:\NASM
    set JOM_dir=D:\Qt\jom
    :: below no need to read
    set StrawBerry_dir=%StrawBerry%\c\bin;%StrawBerry%\perl\bin;%StrawBerry%\perl\site\bin
    set PATH=%NASM_dir%;%StrawBerry_dir%;%JOM_dir%;%PATH%
    :: Refer to https://stackoverflow.com/questions/75869012/unable-to-build-my-c-project-with-jom-qmake-problem
    :: Compiler said "If several cl.exe write in the same file .PDB, use /FS"
    set CFLAGS=/FS 
    set CXXFLAGS=/FS
    :: use call otherwise the below commands will not be executed
    call "C:\Program Files\Microsoft Visual Studio\2022\Community\VC\Auxiliary\Build\vcvarsall.bat" x64 10.0.18362.0 -vcvars_ver=14.0
    perl Configure --prefix=%cd%\openssl_build_output
    jom -j32
    jom test -j32
    :: I don't know why but jom can't read the prefix 
    nmake install -j32

    Reference

    How to Build OpenSSL, zlib, and cURL libraries on Windows
    Notes for Windows platforms – openssl

    Windows下编译ffmpeg(Msvc+msys2)

    时效性声明

    本文使用的版本为ffmpeg n6.1.1, vcvarsall.bat 来源于Visual Studio2022,
    编译器为msvc v140

    具体步骤

    先随便打开一个cmd
    -vcvars_ver=14.0 是为了用msvc v140(VS2015)编译
    -use-full-path 是为了继承cmd里的环境变量到msys2 console里

    "C:\Program Files\Microsoft Visual Studio\2022\Community\VC\Auxiliary\Build\vcvarsall.bat" x64 -vcvars_ver=14.0
    D:\msys64\msys2_shell.cmd -use-full-path

    到了msys2后安装git cmp make nasm

    pacman -S git diffutils make nasm pkg-config

    因为msys2自带的link和msvc里的link会冲突,所以修改原来的link名称

    mv /usr/bin/link /usr/bin/lin

    反正这个link基本用不到(msys2环境是隔离的,生成的库不能直接被msvc链接,还不如mingw64环境,那个至少还能生成可被msvc链接的东西)
    然后克隆和配置,默认安装到/usr/local/ffmpeg-v6.1.1

    git clone https://github.com/FFmpeg/FFmpeg.git --depth 1 -b n6.1.1 ffmpeg-v6.1.1
    cd ffmpeg-v6.1.1
    ./configure --toolchain=msvc --prefix=/usr/local/ffmpeg-v6.1.1

    warning C4828: 文件包含在偏移 0x1d9 处开始的字符,该字 符在当前源字符集中无效(代码页 65001)。make: *** Deleting file ‘libavcodec/msvideo1enc.o’

    可能会遇到编译器信息导致的编码错误(有些人cmd打开默认code page是936)
    直接随便改一下或者根据cl.exe给出的,编辑config.h

    #define CC_IDENT "用于 x64 的 Microsoft (R) C/C++ 优化编译器 19.00.24247.2 版"

    最后

    make -j32
    make install

    Reference

    Windows + MSVC环境编译ffmpeg – 罗均 – 知乎
    FFmpeg wiki:CompilationGuide/MSVC

    关于一直说的MSVC CRT是个什么东西

    https://learn.microsoft.com/en-us/cpp/c-runtime-library/crt-library-features?view=msvc-170

    Orcad Capture CIS

    调整原理图页面默认字体,以及模板默认字体

    Mingw-w64下链接动态库的细节

    比如我想链接一个库-lA,在windows下有import library和static libraray之分,其中import library在mingw下通常以dll.a结尾,而statlic library则直接以.a结尾

    打个比方usb-1.0,

    libusb-1.0.a  libusb-1.0.dll.a

    那么如果-L库路径包含了两个相同的会如何呢
    请阅读binutils关于Win32的官方文档
    这里面说了
    For instance, when ld is called with the argument ‘-lxxx’ it will attempt to find, in the first directory of its search path,

    libxxx.dll.a
    xxx.dll.a
    libxxx.a
    xxx.lib
    libxxx.lib
    cygxxx.dll (*)
    libxxx.dll
    xxx.dll

    所以是默认先找动态库的导入库进行链接的
    其中还有有趣的 direct linking to a dll, 这是说不需要导入库,ld直接连接到一个dll上

    如何让CMake找到QT

    source
    For find_package to be successful, CMake must find the Qt installation in one of the following ways:

    • Set your CMAKE_PREFIX_PATH environment variable to the Qt 5 installation prefix. This is the recommended way.
    • Set the Qt5_DIR in the CMake cache to the location of the Qt5Config.cmake file.
      但是下面那种办法只能找到qt core
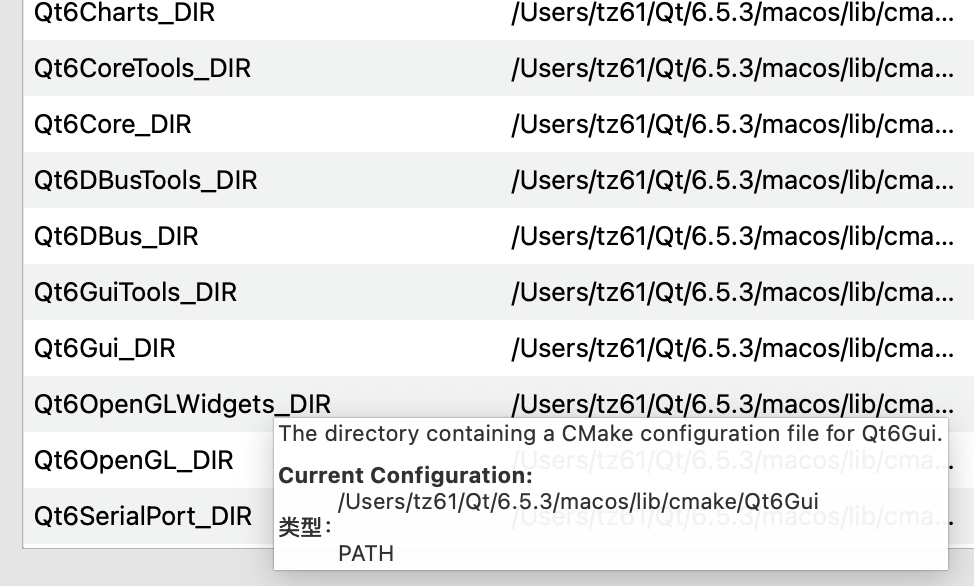
      还需要设置一堆比如

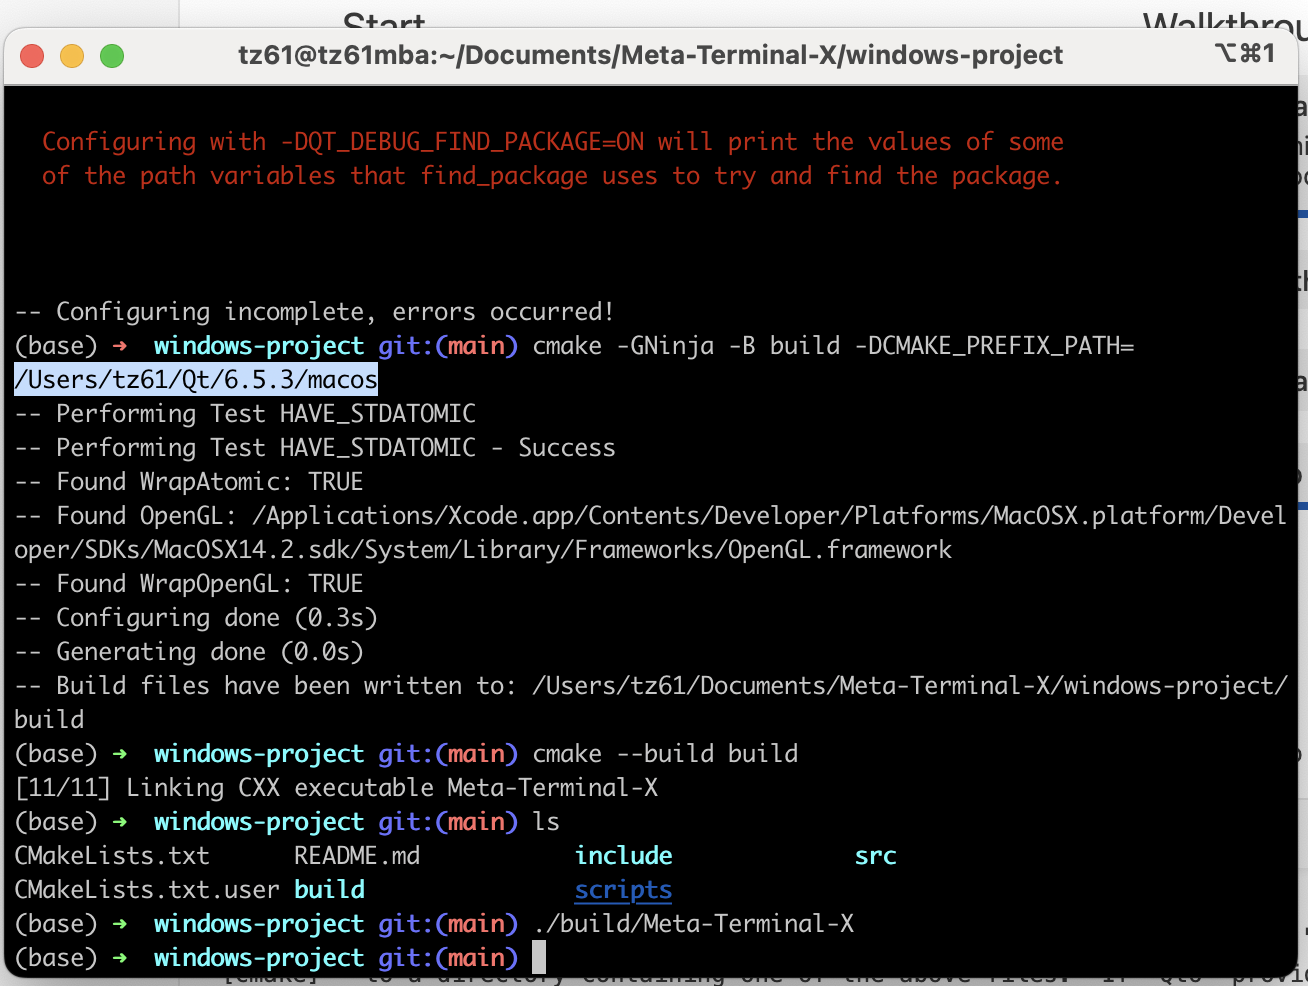
      所以说, recommended approach is to set the CMake cache variable CMAKE_PREFIX_PATH to include the Qt 6 installation prefix

      cmake -GNinja -B build -DCMAKE_PREFIX_PATH=
      /Users/tz61/Qt/6.5.3/macos

      更快地编译QT6

      QT在6以后可以用cmake编译源码了,source

      Windows下CMake可以默认从C:/Qt下找到Qt各个版本

      在linux交叉编译openocd参考

      source

      MSVC BuildTools 老版本下载

      更新:MSVC老编译器可以从VS2022里面下载,没必要单独再搞个BuildTools
      2017: https://aka.ms/vs/15/release/vs_buildtools.exe
      2019: https://aka.ms/vs/16/release/vs_buildtools.exe
      2022: https://aka.ms/vs/17/release/vs_buildtools.exe
      source
      MSVC 14.16 是runtime 版本,10.0.17763.0是Windows SDK版本,19.16.27051是Compiler版本

  • 【每周学习摘要16(23/01/20-24/01/26)】

    QT

    把AUTOUIC开启后
    cmake通过add进executable的file中的include 语句判断ui文件
    其中在include同级目录或者CMAKE_AUTOUIC_SEARCH_PATHS变量下寻找该ui文件
    具体见https://cmake.org/cmake/help/latest/variable/CMAKE_AUTOUIC_SEARCH_PATHS.html#variable:CMAKE_AUTOUIC_SEARCH_PATHS

    Vscode 调试Makefile

    第一个方式,直接修改launch.json

    这个文件从ece220/mps/mp10/.vscode/.launch.json

    "configurations": [
            {
                "name": "(gdb) Launch",
                "type": "cppdbg",
                "request": "launch",
                "program": "${workspaceFolder}/mp10",
                "args": [
                    "graph",
                    "requests",
                    "0"
                ],
                "stopAtEntry": false,
                "cwd": "${fileDirname}",
                "environment": [],
                "externalConsole": false,
                "MIMode": "gdb",
                "setupCommands": [
                    {
                        "description": "Enable pretty-printing for gdb",
                        "text": "-enable-pretty-printing",
                        "ignoreFailures": true
                    },
                    {
                        "description": "Set Disassembly Flavor to Intel",
                        "text": "-gdb-set disassembly-flavor intel",
                        "ignoreFailures": true
                    }
                ]
            }
        ]

    第二个方式,通过Makefile插件

    然后打开workspacesettings.json,修改makefile.launchConfigurations

    {
        "makefile.launchConfigurations": [
            {
                "cwd": "/home/ztn/Documents/cs225sp24/lab_debug",
                "binaryPath": "/home/ztn/Documents/cs225sp24/lab_debug/sketchify",
                "binaryArgs": ["in_111","sddsd"]
            }
        ]
    }

    stm32重定向printf

    需要修改fputc,或者write, 因为不同库实现不一样,而且gcc的newlib版本不同,新版本需要修改write

  • 【每周学习摘要15(23/12/30-24/01/05)】

    ubuntu-base 不能获取串口的原因

    卡在serial getty’
    原因:没有安装udev
    source

    mplayer 播放

    mplayer -vo fbdev2:/dev/fb1 -vf scale=240:135 -geometry 0:50 -fps 30 -ao alsa:device=hw=0.0 badapple.mp4
    alsa那里 hw=0.0 可以用aplay -l 查看card:device
    如果是用drm产生的fb需要用fbdev2:/dev/fb0,其他比如fbtft的就用fbdev:/dev/fb0

    mpg123使用

    mpg123 -o alsa:hw:0,0 mican*\ -\ Deadline.mp3
    同理

    ubuntu-base移植libmali

    参考仓库mirror
    其中我看到官方rk的buildroot镜像里面,libEGL,libgbm的大小都是一样的里面有libmali_hook.so.1的调用关系
    现在知道libmali_hook怎么生成(在刚才那个仓库的hook文件夹下),
    然后libegl,libgbm什么的大小竟然都一样

    (base) ➜  lib ls -l libgbm.so.1 libEGL.so.1 libGLESv1_CM.so.1 libGLESv2.so.2 
    -rwxr-xr-x 1 root root 5784  9月 14 17:01 libEGL.so.1
    -rwxr-xr-x 1 root root 5784  9月 14 17:01 libgbm.so.1
    -rwxr-xr-x 1 root root 5784  9月 14 17:01 libGLESv1_CM.so.1
    -rwxr-xr-x 1 root root 5784  9月 14 17:01 libGLESv2.so.2
    (base) ➜  

    补充:这些libegl,libgbm什么的都是一些wrapper库,具体创建过程在这个脚本里
    meson.build
    我到时候解读一下然后换成用普通命令创建,不用meson

  • 【每周学习摘要14(23/12/23-23/12/29)】

    手动编译最新版本的rockchip bsp linux

    CrossCompile Toolchain

    首先交叉编译工具链可以从linaro下载,这个无所谓

    boot.img

    boot.img是rockchip专有镜像格式 ,需要使用他们kernel仓库的Makefile里面的命令进行打包,具体原理暂时不清楚。
    先把泰山派的设备树拷贝到kernel/arch/arm64/dts/rockchip/下面

    export PATH="$PATH:/home/ztn/Embedded/Allwinner/Allwinner-H616/toolchains/bin"
    ARCH=arm64 CROSS_COMPILE=aarch64-none-linux-gnu- make tspi-rk3566-user-v10-linux.img -j32

    然后可以得到boot.img,这个文件里面包含了内核镜像文件和设备树tspi-rk3566-user-v10-linux.dtb

    u-boot.itb

    这个文件是一个复合体
    需要py2环境
    然后利用rkdeveloptool,先加载bootloader到内存,然后烧录,然后再烧录boot.img,u-boot.itb

    ZYNQ EBAZ4205

    为什么正点原子的镜像启动不了,我猜是启动参数(比如DDR配置不一样)所以说开不起来。已经改了电阻了也不行。
    别慌,明天自己编译一遍

  • 【每周学习摘要13(23/12/16-23/12/22)】

    RK3566 Drm Panel 驱动配置

    1.dt-binding解读-2022-03-24 RK3566 MIPI屏 调试记录,panel-init-sequence 命令格式介绍
    2.配置生成工具-original_mipi_init_sequence-to-rk_dts_panel_init_sequence-convert Public
    panel节点是挂载在dsi0节点下面,如果对应spi屏幕的drm驱动,则是将panel节点挂载在spi0节点下面,参考嵌入式Linux使用TFT屏幕:使用树莓派4B的MIPI-DSI接口点亮ST7701S屏幕

    关于怎么解读屏幕参数和时序,然后填写dts,参考RK3588-MIPI屏幕调试笔记:RK3588-MIPI-DSI之屏参配置
    再具体的话,可以参考rockchip官方bsp仓库-drivers/gpu/drm/panel/panel-simple.c
    arch/arm64/boot/dts/rockchip

    eDP屏幕相关

    RK3568 EDP接口调试

    RockChip编译教程

    其实可以单独下载github上rockchip-linux的官方bsp linux,u-boot仓库单独编译
    也可以设置上次那个H616里面的工具链
    但是在make.sh的第273行需要把none加进去
    然后需要clone rkbin到同级目录

    CROSS_COMPILE_ARM64=$(cd `dirname ${CROSS_COMPILE_ARM64}`; pwd)"/aarch64-none-linux-gnu-"

    具体操作可以看toybrick的仓库里面的make.sh,也可以使用官方推荐的
    比如
    软件开发/U-Boot

    具体编译

    Rockchip-linux kernel-5.10

    git clone https://github.com/rockchip-linux/kernel.git -b develop-5.10 --depth 1
    cd kernel
    ARCH=arm64 CROSS_COMPILE=aarch64-none-linux-gnu- make rockchip_linux_defconfig
    ARCH=arm64 CROSS_COMPILE=aarch64-none-linux-gnu- make -j32

    Rockchip-linux uboot

    直接根据toybrick的进行编译,clone 他们自己的编译工具链后然后照做

    ./make.sh rk3566

    rkdevelop-tool

    需要切换到gcc-7/g++-7编译
    具体操作自己看rkdeveloptool

    在rk3566上编译taisei-v1.3

    没什么好说的,甚至可以用自带的SDL
    之前我以为自带的SDL有bug,其实是因为可能在mingw上面编译的缘故,编译完了有些东西针对mingw平台的没开,然后就启动不了窗口,只能通过pacman安装
    想不到1G内存+tf卡这种丐版配置都能编译SDL2+taiseiv1.3
    但是taisei和extreme-tux-tracer这两个游戏,以及glxinfo监测的时候都只察觉到了llvmpipe 这个软件渲染器。
    但是glmark2-es2就可以完美利用GLES2
    后来我才知道原来GLES2 API不一定需要EGL作为后端,也可以在GLX上面使用,然后glmark2-es2就是在X11上面通过GLX使用了GLES2的API
    taisei和etr估计在链接的时候就用的是gl的API,所以fallback了到llvmpipe上面的api(mesa库提供的)
    然后他们在运行的时候会显示

    libGL error: unable to load driver: rockchip_dri.so
    libGL error: driver pointer missing
    libGL error: failed to load driver: rockchip

    但是跑glmark2-es2就不会出现这些
    根据那个Richardn2002兄弟的在stm32MP157上的源码STM32MP157F-DK2/blob/main/src/gl-test.c
    可以知道,程序链接时需要链接GLESv2库而非GL,然后gl头文件需要用GLES2/gl2.h而非GL/gl.h
    看SDL2的做法好像是用他们自己的头文件套了一层?这个有待研究。先准备math241 mid3先
    然后找到的Xorg加载GLX的流程:Firefly3568-libGL error: failed to load driver: rockchip
    3588上运行qt报错,请指教
    GPU/Driver/libGL error on Rock 4C plus on Debian

    GL4ES

    将gl call 转换成gles call,且自己创建一个context。
    用的时候把编译产生的libGL.so.1放到LD_LIBRARY_PATH就行。
    然后只能运行gles2.0
    然后可以玩etr但是很鬼畜,玩不了taisei

    查看GPU使用率

    RK查看gpu占用率方法

    cat /sys/devices/platform/fde60000.gpu/devfreq/fde60000.gpu/load

    转接板

    st7701的屏幕:(0.5mm pitch),fl7703np(0.3mm pitch)

    fl7703np转接板

    排线 31pin 0.3mm 3块钱一根
    31pin 0.3mm 排座 0.3一个,要两个
    然后是3.3V转1.8V点LDO芯片,芯片准备用ME6206A18XG,输出电压1.8V,那个屏幕没说需要多大电流,然后SOT23-3封装最大功率300mW,所以没关系的。主要这个也便宜
    这个转接板成本加起来可能就5块钱,所以还好
    注意转接板要连接
    泰山派上面的屏幕背光驱动芯片是SY7201,电流计算公式是I=0.2V/R
    所以说驱动st7701s 20mA需要200mV/20mA=10Ohm作为反馈电阻,可以买两个20欧的电阻并联或者直接一个10欧电阻

  • 近期targets

    软件

    参考Sedentary-reminder
    用Qt写一款提醒久坐的软件

    Qt

    做一款基于串口的调试工具
    参考Qt6+Qml实战入门-串口引擎

    Solidworks学习

    视频华中科技大学一周讲完的SolidWorks教程,整整200集,全程干货无废话,学完即可上岗《零基础入门学习sw》

    1

    23/12/12 学到P7,工程练习目录在D:\Mechanical\Tutorial\Playground
    按空格进行视图定向,直线,圆

  • 【每周学习摘要12(23/12/09-23/12/15)】

    STM32

    STM32F334

    官方HAL库如果用gdb调试则会卡在时钟设置,
    但是用ChibiOS 的HAL/RT则没有任何问题。
    尝试探索原因才发现,RCC->CR和RCC->CFGR并非上电后自动变成0,比如CFGR里面的SW一开始就是选择PLL的,但是官方HAL库没有进行检查
    因此ChibiOS的启动文件里面手动对寄存器进行了清零
    下面是ChibiOS里面的STM32F3xx/hal_lld.c的初始化函数,
    HSI是默认开启的,因为手册里写RCC->CR resetval=0x0000 XX83
    这里做了一次检查保证HSI先开起来。
    总流程大概是

    • 1.先检查HSI开启
    • 2.配置CFGR,切换时钟源为HSI
    • 3.清空CFGR和CR(为初始值)
      HSI校正是自动的,

      CFGR2(HSEPrescale)不能写入

      要提前将SW切换到HSI

    
    void stm32_clock_init(void) {
    
    #if !STM32_NO_INIT
      /* HSI setup, it enforces the reset situation in order to handle possible
         problems with JTAG probes and re-initializations.*/
      RCC->CR |= RCC_CR_HSION;                  /* Make sure HSI is ON.         */
      while (!(RCC->CR & RCC_CR_HSIRDY))
        ;                                       /* Wait until HSI is stable.    */
    
      /* HSI is selected as new source without touching the other fields in
         CFGR. Clearing the register has to be postponed after HSI is the
         new source.*/
      RCC->CFGR &= ~RCC_CFGR_SW;                /* Reset SW, selecting HSI.     */
      while ((RCC->CFGR & RCC_CFGR_SWS) != RCC_CFGR_SWS_HSI)
        ;                                       /* Wait until HSI is selected.  */
    
      /* Registers finally cleared to reset values.*/
      RCC->CR &= RCC_CR_HSITRIM | RCC_CR_HSION; /* CR Reset value.              */
      RCC->CFGR = 0;                            /* CFGR reset value.            */

    然后在STM32官方HAL库的HAL_RCC_OscConfig函数最前面加上清零

    HAL_StatusTypeDef HAL_RCC_OscConfig(RCC_OscInitTypeDef  *RCC_OscInitStruct)
    {
      uint32_t tickstart;
      uint32_t pll_config;
    #if defined(RCC_CFGR_PLLSRC_HSI_PREDIV)
      uint32_t pll_config2;
    #endif /* RCC_CFGR_PLLSRC_HSI_PREDIV */
      // Added by TonyZhang, following ChibiOS's startup file
        RCC->CFGR &= ~RCC_CFGR_SW;                /* Reset SW, selecting HSI.     */
        while ((RCC->CFGR & RCC_CFGR_SWS) != RCC_CFGR_SWS_HSI)
            ;                                       /* Wait until HSI is selected.  */
        RCC->CR &= RCC_CR_HSITRIM | RCC_CR_HSION; /* CR Reset value.              */
        RCC->CFGR = 0;

    对于什么是HSE Bypass

    寄存器里可以配置HSE(告诉外部晶振)是否bypass,
    如果选择bypass, 则接收外部时钟信号(有源晶振)
    如果关闭bypass,则外部为无源晶振+陶瓷电容组成的振荡器,内部会开启反相器构成皮尔斯振荡器进行震荡

  • 【每周学习摘要10(23/11/25-23/12/01)】

    Allegro

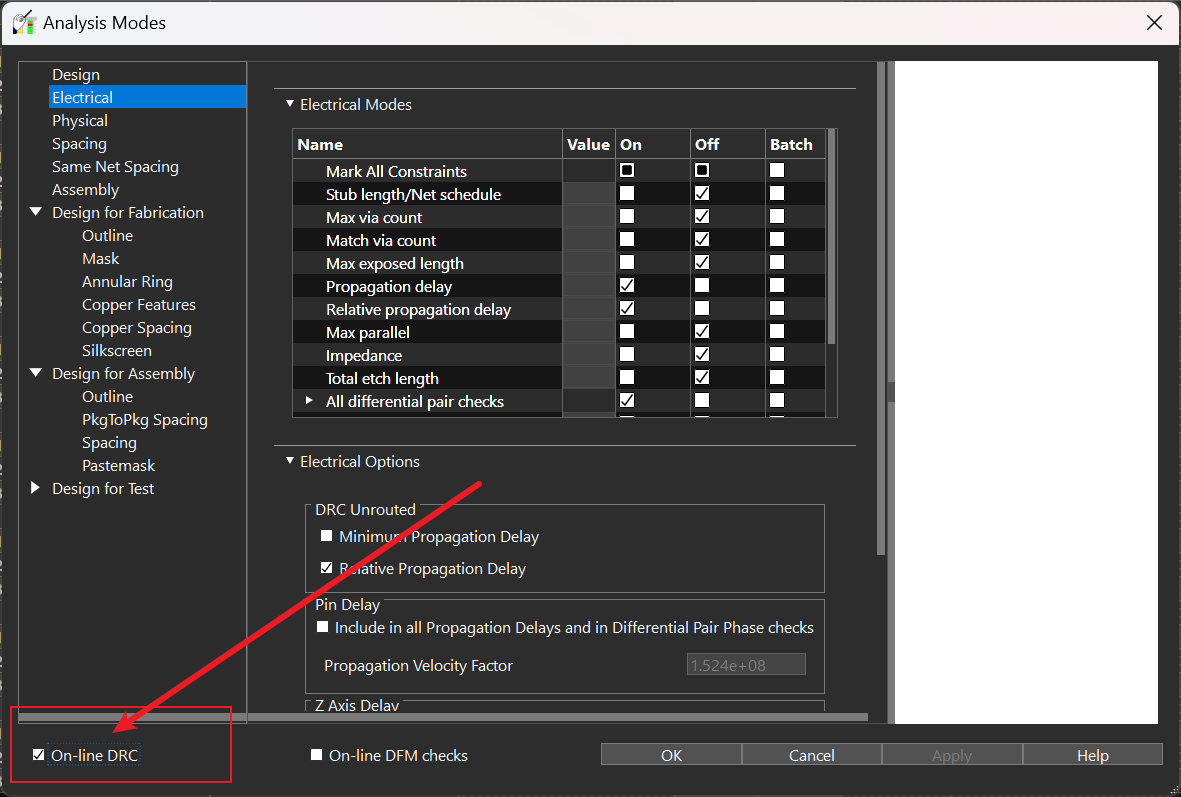
    当rel prop delay 不能显示为绿色的时候
    检查 On-line DRC有没有打开